Thursday, November 12, 2015

Activity 4: Water Distribution


Activity 4: Water Distribution


Characterising a pump


           Have you ever wondered how the water in your taps, sink and showers get in to your homes? Well first we have to look at where all the water in the world are found.


            So as you can see there is only about 2.5% of freshwater on our planet. Then 68.8 % of that freshwater is frozen and another 30.1% are underground. The remaining freshwater found on the surface is all in our lakes and reservoirs. So now you know where the water comes from but how does it arrive in your homes? The answer to that question is pumps. Pumps Pumps all have different flow rates. Our Mechanical teacher for ED Mr. Tune thought us the way to obtain the characteristics of the pump, In order to obtain the characteristics of the pump we had to plot a graph of Head (H) which is height of the pump to the surface of the water against Mass flow rate (Q) which is the amount of water we collected in a certain amount of time.


            In order to get these information this we had to conduct an experiment. The following things were needed:
-1 Big Bucket
-1 Small Bucket
-1 Measuring Tape
-1 Pump
- 1 Pipe (1m long)
- 1 Stopwatch (On our Ipad/Phone)


Mass of the empty small bucket

The first thing we had to do was to find the maximum height of water our pump could pump.
The maximum height was about 60 cm.
Then we had to obtain the mass of water our pump could pump at intervals of 10 cm. We planned to conduct each test with the time limit of 60 sec.
Keeping track of the time

 To obtain the mass of the water we had to take our obtain the mass with the bucket with water and subtract the mass of the empty bucket.(All pictures with mass includes bucket mass)


At 50 cm


At 40 cm
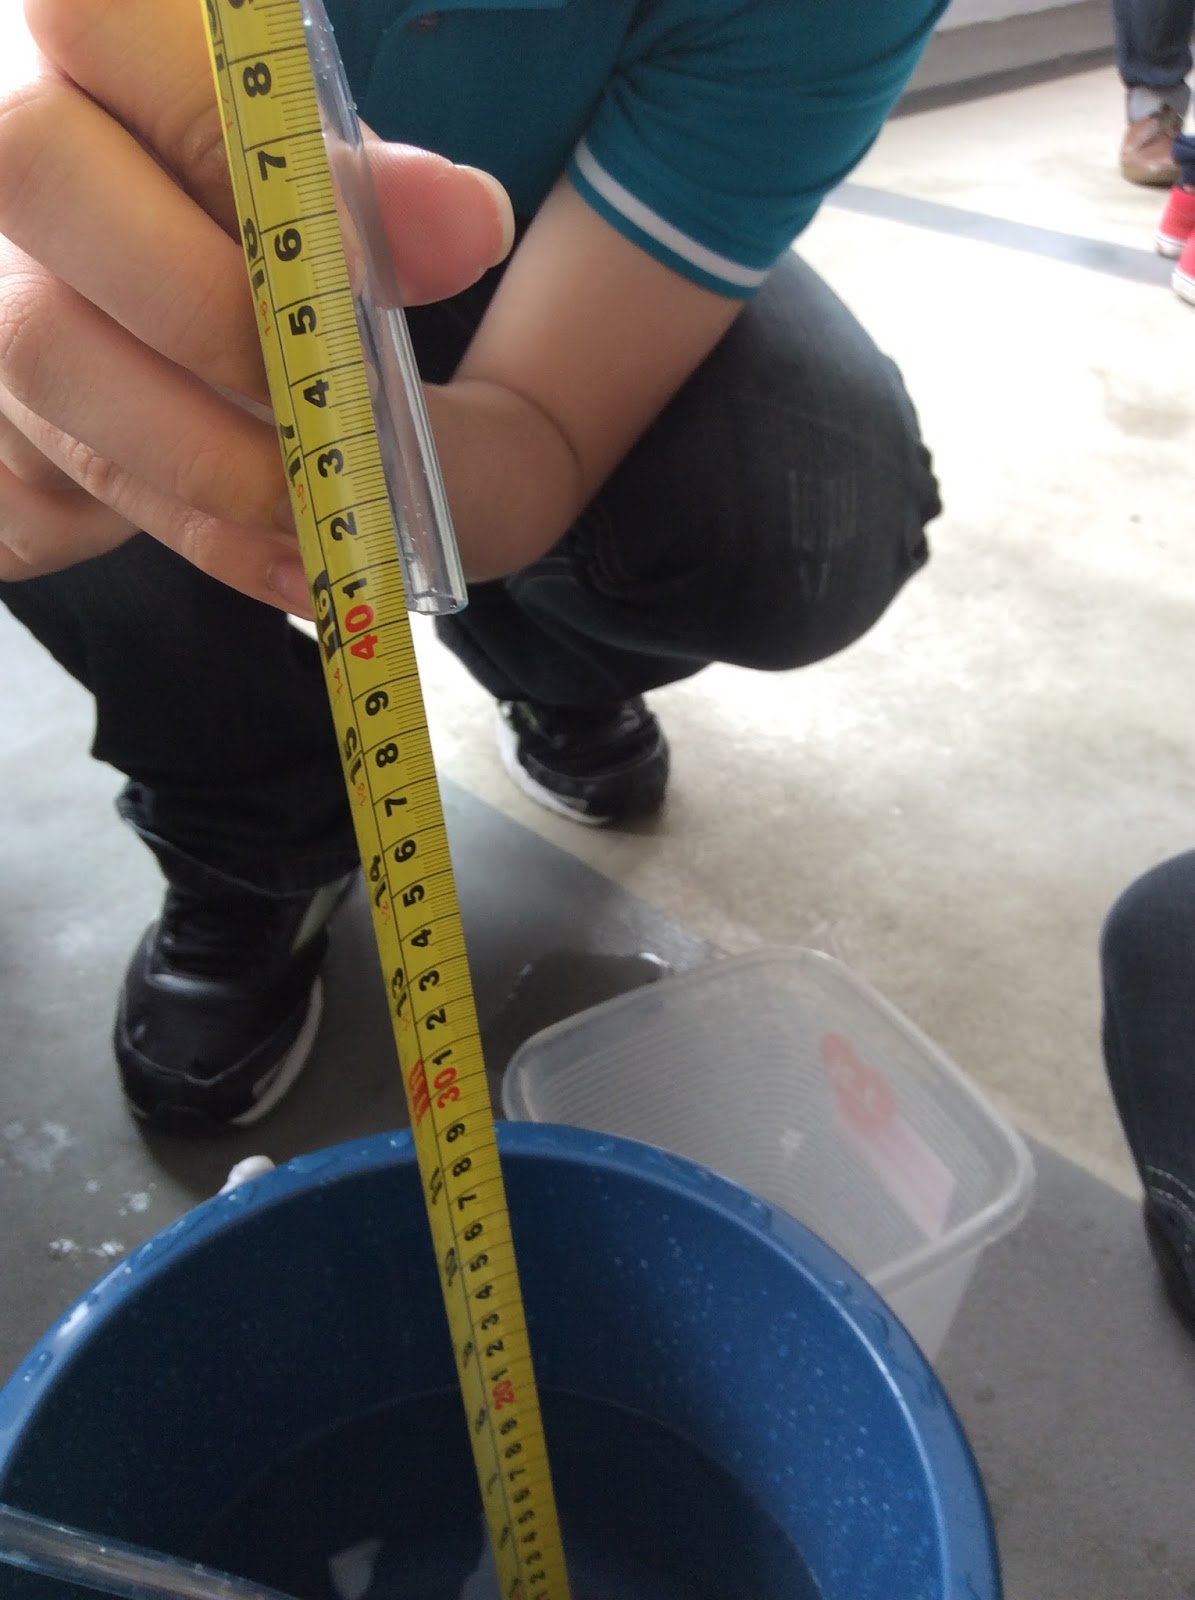


At 30 cm


At 20 cm
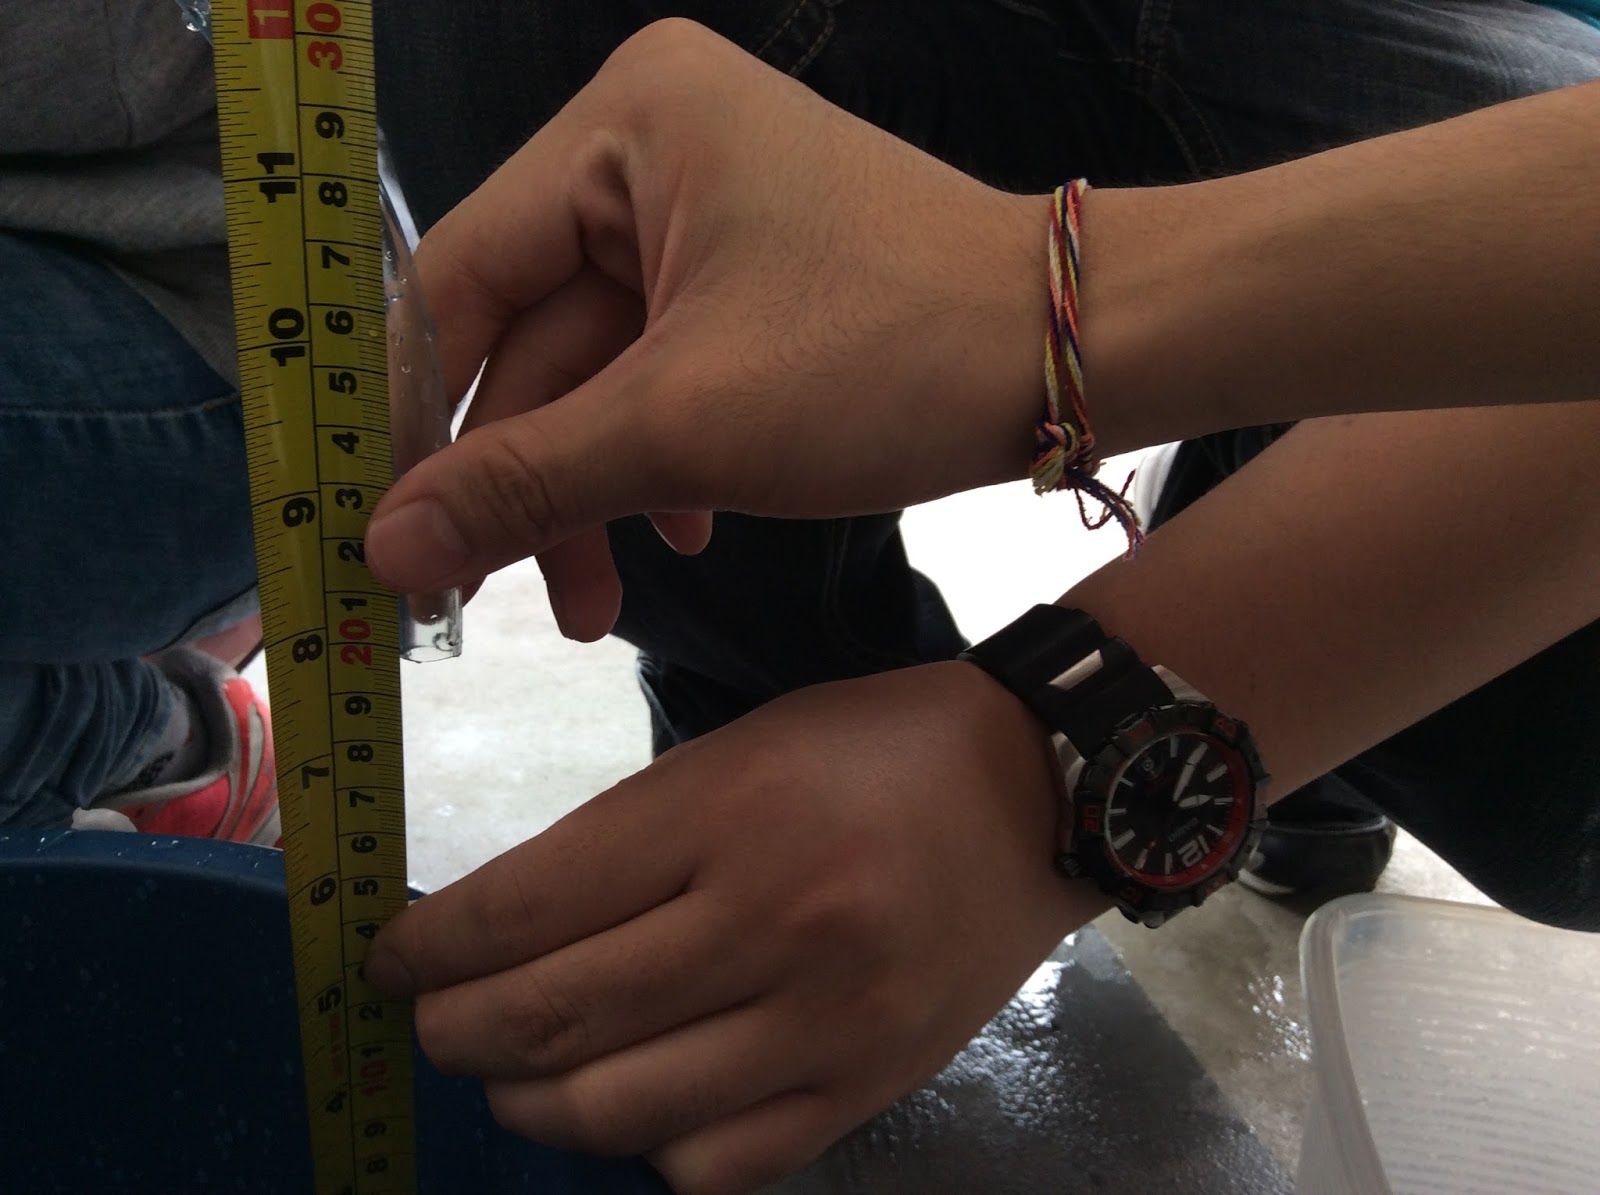


At 10 cm 


At 0 cm


Finally its time to plot the graph
           
            So in order to plot the graph we needed to divide our mass by the time taken to get (Q). And plot (Q) against (H).

Our graph


Now that we were done with the pump its time for math!

After the pump experiment our Math Teacher for ED Dr. Xin Yi showed us how to find the best straight line using excel. As well as explaining what is correlation coefficient. Correlation Coefficient is basically how many points are on the best straight line. r 2 is the percentage of total variations of the points on the line.


That's the end of this week activities. See you next week. Thanks for reading! 

Tuesday, November 10, 2015

SPECIFICATION REPORT

Project statement


The Water Surveyor

Data required from a water body are usually taken during surveys. The pattern of the survey depends on the vehicles designed. Often boats tow sensors. The process can be also be replaced by autonomous vehicles to get uniform data in terms of depth and location.
Can we design a vehicle to take measurements of temperature of the surface in a lawn mower pattern?

Functions of the vehicle

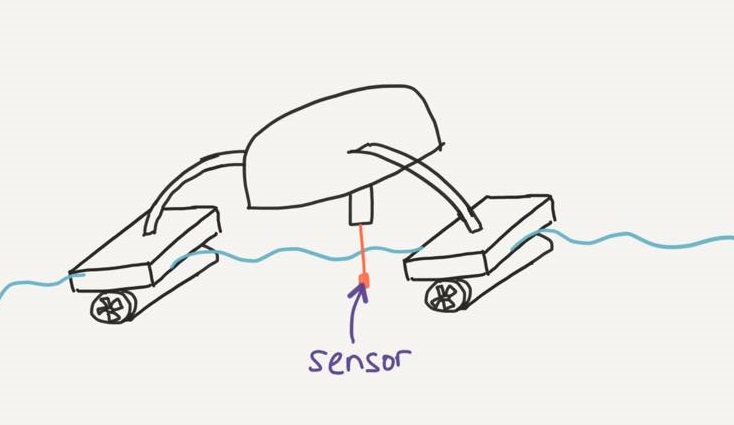
This vehicle will be able to detect the temperature of the water surface with an accuracy of 0.1 degree celsius using the temperature sensor that we did during week 1 activity. It can be operated by 2 ways, the first is automatic control and the other is by man control.

For the automatic operation, the vehicle will be able to move by itself intelligently without people controlling.This is definitely more work-efficient and reduce unnecessary man-power.  When it reaches the end of a lane, it will change directions to the next lane, which means that which it reaches a specific distance, it will automatically turn 90 degree and so on until a lawn mower pattern is achieved. If there is an obstacle halfway, the vehicle is able to detect the obstacle and send message to warn the users ( man control ) or it can automatically dodge the obstacle (automatic control).
If the automatic system malfunctions, we can switch to the man control to control the movement of the vehicle. It is a prevention for accident from happening.

Not only that, our vehicle will move in a lawn mowing pattern to obtain the temperature of surface water at different position from time to time in automatic mode. Why lawn mowing pattern? This is because by moving our vehicle with lawn mowing pattern, we can obtain data with larger coverage of area on water and also more detailed results of water temperature.

A phone app will be created for this vehicle. This apps can collect data of the water surface temperature from the vehicle and calculate out the average temperature for the surface water. Message of warning will be sent to the users through the apps when the temperature of water is whether too high or too high . This function is indispensably essential especially to biologists for them to prevent algae bloom. Early blue–green algae blooms usually develop when water temperature is higher and there is increase of light. Water temperatures above 25°C are optimal for the growth of Cyanobacteria. Hence, our product is important for biologists to take control of water temperature so that they can prepare precautionary steps to counter the algae bloom problem.

Sketches:
IDEA 1:
TOP VIEW


  • When the edge knocks into the end of a lane, the case will be pressed and compressed which then hit the button. Then the vehicle will start to change direction.

Improvement:


  • Main material: aluminium and polystyrene
  • Ultrasonic sensor in front of the vehicle and the sides to detect obstacle or wall.
  • Temperature sensor on the boat body which carries the electronic circuits.
  • Thruster at two sides of the vehicle.

How the sensors work?

The vehicle start at position 1. At position 2, it getting near to the end, the front sensor and the right side sensor will activate and start to slow down by reversing the direction of motor. The vehicle will stop at position 3. It detects the wall is at the right and so take the first turn to left and turn again to left. For the rest directions turn will be alternative for example right-right, left-left, right-right and so on.

At the position 4, the vehicle slows down and stop at position 5. It turn left and left again. At position 6, even the front sensor and the right sensor is activated, but it will not affect the direction as the program is affected by the two sensors only during the first turn and not the second turn at any turn points.

At position 7, the vehicle is support to take the first turn to right but because the right sensor is activated so it affects the program and stop the vehicle at that point.

SIDE VIEW


Motor directions:

  • The diagram shows how our thrusters or propellers change the direction of vehicle, whether to right or left.
  • For example,if we want our vehicle to turn left, we program our propeller in a way such that the left propeller turns in reverse direction ( anti-clockwise ) while the right propeller turns in forward direction ( clockwise ) and vice versa.

IDEA 2:


  • Sphere form vehicle with two thrusters or propeller at two sides.

Disadvantage:
  • It is tough to find out its centre of gravity, which makes it unstable.

Phone Apps Control:

  • Temperature reading up to one decimal place is shown clearly to the users.
  • Control the movement of vehicle using the arrow buttons on the screen.
  • The pink dot on the screen indicates the position of the vehicle, while the orange line indicates the pathway of the vehicle.
  • Notice that there is a message icon on the bottom left, it is to alert the users when the temperature of water gets too high or low as well as indicating if there is an obstacle.


Other pattern of design:
  • Basically a rocket-like boat with a streamlined body design.
  • Has three thrusters or propellers serve as propulsion device.

  • Center of body floats on air supported by two sides of thrusters on water.

Disadvantage:
  • Has high centre of gravity, which makes it difficult to achieve stability on water.

Improvement:
  • Lower centre of gravity
  • Can be controlled to achieve desired stability on the water surface.


Sensors and Electronics:

  • Temperature sensor (we already have one)
  • Arduino board (we already have one)
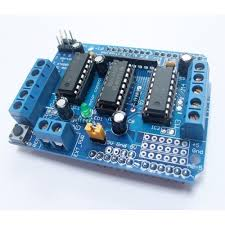
  • Arduino motor shield

~allows you to be able to power a motor with a separate power supply of up to 12v.

  • motors (x2)
  • Transistor
  • InfraRed photodiode (x3)
  • InfraRed LED (x3)
  • Ultra sonic sensor (x3)


Building Materials:

  • Acrylic
  • Polystyrene foam
  • Aluminium hollow or solid shaft
  • Spring

Saturday, November 7, 2015

Second Episode of Week 3 Avtivity


Hi, this is Group 8. Welcome to our blog! :D  Today's blog is the ' second episode ' of Week 3 activity.

Our first doing for Activity 3 was not going very well and pretty much a mess. The boat that we made cannot balance properly with the loads on the water. This is because we misunderstood the volume needed for the boat and we mistakenly included platform to our actual volume of the boat that we calculated. Hence, my handsome teammate, Weng Siong and I decided to remake our boat during our free time on Wednesday.

To add on, the actual reason why our boat cannot balance well on water can be simply summarised with the picture below :

Our previous combat boat has a higher centre of gravity than centre of buoyancy,causing it to be unstable.The weight of the boat and loads together act downward through the centre of gravity. The corresponding buoyant force acts upward through the centre of buoyancy.With the addition of loads, our boat will tilt one side downward and make our boat overturn.
Therefore, we designed our new boat in a shape of teardrop. Why is streamlined body our choice? It is because it has the least drag coefficients when encountering fluid flow.

This is our calculation to find out volume needed to make our boat. Making use of formula of density, we found out the volume needed for our boat.We have spared 16 % extra for our boat in order to make it function smoothly.

The materials that we used remained the same, which are styrofoam, stick, UHU glue and wires. Just that we changed our loads from bottles to two cans of 100 plus as 100 plus can be controlled easier.


After several attempts, we successfully built it out. Its balance on water is good and it worked perfectly well!  We started taking new readings and recorded them down for our assignment. 


Never Give Up! This is what I have learnt throughout Activity 3. Although it is tiring and time-consuming, the desired outcome that we achieved is indeed worth the effort. Once again, thank you for reading this :D

Friday, November 6, 2015

Activity 3: Build a Ship!! :D

Activity 3: Buoyancy, Stability, Drag of Surface Vessels

Hello guys, welcome back to our blog! Today's activity is all about water and ship. Our lecturer, Mr Tune has kicked start the lesson by showing us the video of the history of ship. In the ancient time, the Europe countries build the ship for war. When the scientist or engineering first built the ship with 1 layer to locate the cannon, they showed it to the king. The king looked at it and felt that the warship is not strong enough, he wanted the strongest warship to win the war. So the engineers ( which are the carpenters that time)  designed the warship in 2 layers for the cannon.


Then we have some lessons about our today activity. He taught us about the shapes that affect the stability. This is quite related to one of my idea. Initially, one of my idea for our main project is we make the vehicle in a sphere form.


A sphere form vehicle is not that good as it will be easy to capsize. Besides, it is quite tough to find the center gravity of a sphere vehicle to counter the capsize by the buoyancy.

Besides, we also learned the relationship between the shape and the drag coefficient. Based on the lesson, the streamlined body has the least drag coefficient. Yet, we must know which side to face the flow of water else it will increase the drag coefficient of it.

But, if the vessel is not very large, the drag coefficient will not be affected much.

Yeahh! Now is the time for all the geniuses to workout. We have to build out a ship that can able to withstand the weight of 2 bottles/cans and a pump. The pump is for propulsion purpose.

This is the pump.
We have to use the polystyrene foam to make our ship. Because of the insufficient of materials, we have to share 1 big sheet of polystyrene foam with our neighbour.Before starting to cut the polystyrene foam, we must do some calculation first to find out how big we should cut by finding the volume. The volume of the polystyrene foam we cut is larger or equal to the volume of the water displaced.

First of all, we measured the mass of the 2 bottles and the pump.


Then we do some calculations to find out the volume of water displaced and the volume of polystyrene foam to be cut. Let me show you our calculations below:


After that, we think about the shape for our boat. Initially, we came out an idea of making a streamlined body for the boat. We can make it by combining 1 semi-circle and 1 triangle.


Yet after some discussion, we decided to make it simple by using triangle and square only.


Then, we start to draw out the shapes on the polystyrene foam and cut it using the hot wire foam cutter.


We assemble the polystyrene foam using the UHU glue but it is not strong enough. So we use wooden stick to poke them together. We then install the pump to the wooden stick between the half triangle by using the cable ties. To save the usage of polystyrene foam, we decided to secure the water bottles using the perforated steel bands and steel wiring. Ta daaaaaaa! This is our first hand-made boat.


Does it look cool? Like a special combat boat? HAHA

So we felt very excited and quickly went and tested out our boat. Yet, we felt disappointed as the boat capsized. We thought we did wrongly about the support for the water bottles. After trying few times it still capsized!

Suddenly, I feel curious that why are other groups' boat is so big in size but ours is so small. So I went to double check with them and I realized that actually we had the wrong concept in our mind. The volume of the polystyrene foam should be just the polystyrene which the surface is in contact with the water. We should not include the platform but we designed it in such a way that the volume of the platform included the volume of the polystyrene that float on the water. The polystyrene foam that float on water did not have the actual volume it should have. That's the reason why our boat will capsized.

Due to the lack of the time and insufficient of materials, we cannot redo a boat. Thus, our professor, Chung Haw gave an idea that we can add 2 rectangular polystyrene foam in between of the half traingle to balance back to the actual volume. The photo below show the improved boat.


We improved and tried the boat again. And finally this time the boat was able to float on the water. When we powered our the water pump, the boat was able to move forward also. Then, we did a test to the boat to figure out the maximum angle it can withstand without capsize when the boat is tilted to 1 side on the water. Then we conducted a test to figure out the metacentric height of our boat by adding weigh on 1 side of the boat.

The activities we did today is no doubt very useful to us. We can apply all the knowledge we have learnt today in our main project.